Arduino – die neusten Beiträge

Wie behebe ich dieses Upload-Problem (Arduino)?

Ich brauche Hilfe... Ich möchte ein Projekt bauen, das auf einem LCD ein VU-Meter, sowie eine digitale Uhr anzeigt. Den Code habe ich von einem Youtuber kopiert (Cine-Lights), und alle Libraries habe ich auch. Jdeoch steht beim Upload: Bla Bla Bla, Zugriff verweigert... Der Fehlercode ist hier:

Arduino: 1.8.9 (Windows 8.1), Board: "Arduino/Genuino Uno"

C:\Users\Marvin\Downloads\Programme\arduino-1.8.9-windows\arduino-1.8.9\arduino-builder -dump-prefs -logger=machine -hardware C:\Users\Marvin\Downloads\Programme\arduino-1.8.9-windows\arduino-1.8.9\hardware -tools C:\Users\Marvin\Downloads\Programme\arduino-1.8.9-windows\arduino--prefs=runtime.tools.avrdude-6.3.0-arduino14.path=C:\Users\Marvin\Downloads\Programme\arduino-1.8.9-windows\arduino-1.8.9\hardware\tools\avr -prefs=runtime.tools.avr-gcc.path=C:\Users\Marvin\Downloads\Programme\arduino-1.8.9-windows\arduino-1.8.9\hardware\tools\avr -prefs=runtime.tools.avr-gcc-5.4.0-atmel3.6.1-arduino2.path=C:\Users\Marvin\Downloads\Programme\arduino-1.8.9-windows\arduino-1.8.9\hardware\tools\avr -verbose C:\Users\Marvin\Downloads\vumeterclock\vumeterclock\lcdvumeter\lcdvumeter.ino

C:\Users\Marvin\Downloads\Programme\arduino-1.8.9-windows\arduino-1.8.9\arduino-builder -compile -logger=machine -hardware C:\Users\Marvin\Downloads\Programme\arduino-1.8.9-windows\arduino-1.8.9\hardware -tools C:\Users\Marvin\Documents\Arduino\libraries -fqbn=arduino:avr:uno -vid-pid=0X2341_0X0043 -ide-version=10809 -build-path C:\Users\Marvin\AppData\Local\Temp\arduino_build_61715 -warnings=none -build-cache C:\Users\Marvin\AppData\Local\Temp\arduino_cache_745094 -prefs=build.warn_data_percentage=75 -prefs=runtime.tools.arduinoOTA.path=C:\Users\Marvin\Downloads\Programme\arduino-1.8.9-windows\arduino-1.8.9\hardware\tools\avr -prefs=runtime.tools.arduinoOTA-1.2.1.path=C:\Users\Marvin\Downloads-prefs=runtime.tools.avr-gcc.path=C:\Users\Marvin\Downloads\Programme\arduino-1.8.9-windows\arduino-1.8.9\hardware\tools\avr -prefs=runtime.tools.avr-gcc-5.4.0-atmel3.6.1-arduino2.path=C:\Users\Marvin\Downloads\Programme\arduino-1.8.9-windows\arduino-1.8.9\hardware\tools\avr -verbose C:\Users\Marvin\Downloads\vumeterclock\vumeterclock\lcdvumeter\lcdvumeter.ino

Using board 'uno' from platform in folder: C:\Users\Marvin\Downloads\Programme\arduino-1.8.9-windows\arduino-1.8.9\hardware\arduino\avr

Using core 'arduino' from platform in folder: C:\Users\Marvin\Downloads\Programme\arduino-1.8.9-windows\arduino-1.8.9\hardware\arduino\avr

open C:\Users\Marvin\AppData\Local\Temp\arduino_build_61715\sketch\lcdvumeter.ino.cpp: Zugriff verweigert

Error compiling for board Arduino/Genuino Uno.

Bitte helft mir

Computer, Technik, programmieren, Arduino, LCD

Arduino upload geht nicht?

hey, ich fange gerade mit arduino zeug an und wenn ihc versuche einen einfachen code upzuloaden kommt in der ide folgende fehlermeldung:

////////////////

Arduino: 1.8.9 (Windows 10), Board: "Arduino Nano, ATmega328P"

Sketch uses 942 bytes (3%) of program storage space. Maximum is 30720 bytes.

Global variables use 9 bytes (0%) of dynamic memory, leaving 2039 bytes for local variables. Maximum is 2048 bytes.

D:\Programme\arduino ide\Arduino\hardware\tools\avr/bin/avrdude -CD:\Programme\arduino ide\Arduino\hardware\tools\avr/etc/avrdude.conf -v -patmega328p -carduino -PCOM9 -b115200 -D -Uflash:w:C:\Users\Andreas\AppData\Local\Temp\arduino_build_797620/redgreensig.ino.hex:i

avrdude: Version 6.3-20171130

        Copyright (c) 2000-2005 Brian Dean, http://www.bdmicro.com/

        Copyright (c) 2007-2014 Joerg Wunsch

        System wide configuration file is "D:\Programme\arduino ide\Arduino\hardware\tools\avr/etc/avrdude.conf"

        Using Port                   : COM9

        Using Programmer             : arduino

        Overriding Baud Rate         : 115200

avrdude: stk500_recv(): programmer is not responding

avrdude: stk500_getsync() attempt 1 of 10: not in sync: resp=0x6a

avrdude: stk500_recv(): programmer is not responding

avrdude: stk500_getsync() attempt 2 of 10: not in sync: resp=0x6a

avrdude: stk500_recv(): programmer is not responding

avrdude: stk500_getsync() attempt 3 of 10: not in sync: resp=0x6a

avrdude: stk500_recv(): programmer is not responding

avrdude: stk500_getsync() attempt 4 of 10: not in sync: resp=0x6a

avrdude: stk500_recv(): programmer is not responding

avrdude: stk500_getsync() attempt 5 of 10: not in sync: resp=0x6a

avrdude: stk500_recv(): programmer is not responding

avrdude: stk500_getsync() attempt 6 of 10: not in sync: resp=0x6a

avrdude: stk500_recv(): programmer is not responding

avrdude: stk500_getsync() attempt 7 of 10: not in sync: resp=0x6a

avrdude: stk500_recv(): programmer is not responding

avrdude: stk500_getsync() attempt 8 of 10: not in sync: resp=0x6a

avrdude: stk500_recv(): programmer is not responding

avrdude: stk500_getsync() attempt 9 of 10: not in sync: resp=0x6a

avrdude: stk500_recv(): programmer is not responding

avrdude: stk500_getsync() attempt 10 of 10: not in sync: resp=0x6a

avrdude done. Thank you.

Problem uploading to board. See http://www.arduino.cc/en/Guide/Troubleshooting#upload for suggestions.

This report would have more information with

"Show verbose output during compilation"

option enabled in File -> Preferences.

///////////////

Das ist der Code falls es relevant sein sollte...int led = 5; // the pin the LED is connected to

void setup()
{
pinMode(led, OUTPUT); // Declare the LED as an output
}

void loop()
{
digitalWrite(led, HIGH);
delay(1000);
digitalWrite(led, LOW);
delay(1000);
}

ps. port und board sind richtig ausgewählt

lg

Computer, Technik, programmieren, Arduino, Technologie

Arduino Fehlermeldung programmer not responding?

Arduino: 1.8.9 (Windows Store 1.8.21.0) (Windows 10), Board: "Arduino/Genuino Uno"

Der Sketch verwendet 724 Bytes (2%) des Programmspeicherplatzes. Das Maximum sind 32256 Bytes.

Globale Variablen verwenden 9 Bytes (0%) des dynamischen Speichers, 2039 Bytes für lokale Variablen verbleiben. Das Maximum sind 2048 Bytes.

avrdude: stk500_recv(): programmer is not responding

avrdude: stk500_getsync() attempt 1 of 10: not in sync: resp=0x8d

avrdude: stk500_recv(): programmer is not responding

avrdude: stk500_getsync() attempt 2 of 10: not in sync: resp=0x8d

avrdude: stk500_recv(): programmer is not responding

avrdude: stk500_getsync() attempt 3 of 10: not in sync: resp=0x8d

avrdude: stk500_recv(): programmer is not responding

avrdude: stk500_getsync() attempt 4 of 10: not in sync: resp=0x8d

avrdude: stk500_recv(): programmer is not responding

avrdude: stk500_getsync() attempt 5 of 10: not in sync: resp=0x8d

avrdude: stk500_recv(): programmer is not responding

avrdude: stk500_getsync() attempt 6 of 10: not in sync: resp=0x8d

avrdude: stk500_recv(): programmer is not responding

avrdude: stk500_getsync() attempt 7 of 10: not in sync: resp=0x8d

avrdude: stk500_recv(): programmer is not responding

avrdude: stk500_getsync() attempt 8 of 10: not in sync: resp=0x8d

avrdude: stk500_recv(): programmer is not responding

avrdude: stk500_getsync() attempt 9 of 10: not in sync: resp=0x8d

Problem beim Hochladen auf das Board. Hilfestellung dazu unter http://www.arduino.cc/en/Guide/Troubleshooting#upload.

avrdude: stk500_recv(): programmer is not responding

avrdude: stk500_getsync() attempt 10 of 10: not in sync: resp=0x8d

Dieser Bericht wäre detaillierter, wenn die Option

"Ausführliche Ausgabe während der Kompilierung"

in Datei -> Voreinstellungen aktiviert wäre.

Was machen?

Computer, Technik, programmieren, Arduino

SoftwareSerial wie benutzen?

Hallo an die Arduino- Community,

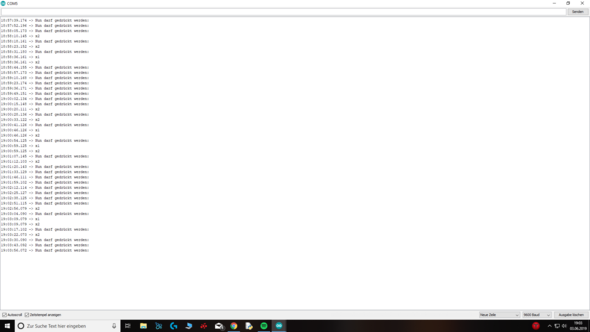
Ich habe mich ja schon sehr viel mit dem Arduino beschäftigt, aber natürlich nicht genug und es ist wahrscheinlich auch nur ein Bruchteil des Möglichen. So genug drum gelabert, zu meiner Frage: Ich benutze die App Blynk zusammen mit dem Arduino Uno, diese muss zum funktionieren eine durchgehende Verbindung zu meinem Serial Port (COM4 in meinem aktuellen Fall) haben, damit die funktioniert. Das bedeutet natürlich, dass ich meinen Seriellen Monitor nicht offen haben kann, da der ja ebenfalls auf den Port zugreifen muss, und nur 1 gleichzeitig geht.

Ich habe aber gehört, ich kann über den SoftwareSerial - Befehl einen zweiten Seriellen Monitor haben... Weiß nur gar nicht, wie der funktioniert, frei hätte ich aktuell die Pins 7 und 8 dafür.

Wie kann ich diesen zweiten Serial erstellen und IHN AUCH ÖFFNEN?

Ich möchte da auf dem Serial2.print nutzen, geht das? (Ich will ihn quasi, wie einen ganz normalen Seriellen Monitor nutzen... Über extra Software geht nichts. Ich habe zumindest schon PuTTY probiert, da öffnet der aber den Port nicht. )

Hier mein bisheriger Code: Blynk braucht halt einen der Seriellen Ports zum funktionieren, was muss ich hier anders machen? (müsst glaube ich nicht zwingend Ahnung von der App haben)

#define BLYNK_PRINT DebugSerial
#include <SoftwareSerial.h>
SoftwareSerial DebugSerial(7, 8); // RX, TX
#include <BlynkSimpleStream.h>
char auth[] = "UnFNS1fIbvFVX8QGBWDoBKah3aWND6dn";
void setup() {   DebugSerial.begin(9600);   Serial.begin(9600);   Blynk.begin(Serial, auth);
//anderer stuff
}
void loop () {
Blynk.run();
//zum Beispiel:
if (Buttongedrückt) {
DebugSerial.println("Button gedrückt");
...stuff
}

MFG Alex - Freue mich auf eure Antworten!

Software, programmieren, Arduino, cmd, C (Programmiersprache), RX, TX, Serielle Schnittstelle

Arduino: millis() als delay() in If-Klause benutzen?

Hi! Ich suche schon lange nach einer Lösung wie ich millis() als delay() benutzen kann. Ich habe einen Bodenfeuchtesensor und ein Relais, das an eine Pumpe angeschlossen wird. Ich möchte, dass das Relais für 10 Sekunden angeht, wenn der Bodenfeuchtesensor einen Wert über 600 ausspuckt. Bisher lautet die If-Klause so:

(siehe unten)

Möchte das aber gerne mit millis() machen. Habe schon viel studiert und probiert, aber keine Lösung gefunden. Nachgelesen habe ich auch. Das Prinzip von millis habe ich verstanden, nur nicht, wie das in einem If-Satz funktioniert.

Vielen Dank für Eure Hilfe!

#include "DHT.h"
#define DHTPIN 12
#define DHTTYPE DHT22

//VENT DELAY//
long schedule_freq = 3200000L;
long schedule_duration = 300000L;


long schedule_timestamp = 0L;
long schedule_timestamp_off = 0L;


bool schedule = false;
//VENT DELAY//


//PUMP//

//PUMP//


const int heatPin = 7;
const int ventPin = 4;
const int pumpPin = 12;


int moist_value = analogRead(A0);

DHT dht(DHTPIN, DHTTYPE);


void setup() {
  dht.begin();
  pinMode(heatPin, OUTPUT);
  pinMode(ventPin, OUTPUT);
}


void loop() {
  float t = dht.readTemperature();
  float h = dht.readHumidity();


  if (t <= 16.0) {
      digitalWrite(heatPin, HIGH);
  }


  if (t >= 25.0) {
    digitalWrite(heatPin, LOW);
  }


  if(moist_value >= 600) {
    digitalWrite(pumpPin, HIGH);
    delay(10000);)
    digialWrite(pumpPin, LOW;
    
    }
    
      if (schedule_timestamp < millis()) {
      schedule_timestamp = millis() + schedule_freq;
        schedule_timestamp_off = millis() + schedule_duration;
        schedule = true;
        //Vent On
        digitalWrite(ventPin, HIGH);
      }
    
    
      if (schedule_timestamp_off < millis() && schedule ) {
      schedule = false;
      //Vent Off
      digitalWrite(ventPin, LOW);
    
    
      }
    
    
    }
Computer, Technik, programmieren, Arduino, Technologie, C (Programmiersprache), If clauses, Arduino Uno, Arduino IDE

Schrittmotor einfach drehen- Arduino?

Seid gegrüßt,

Ich möchte über einen PS2 Controller einfach einen Schrittmotor ansteuern, also sprich ich drücke eine Taste und er dreht solange in diese Richtung, wie die Taste gehalten wird. Nur mit zwei Tasten, für 2 Richtungen, vor und zurück.

Eigentlich Frage: Wie code ich das am Besten?

Also etwa so (mal so erklärend):

if(ps2x.ButtonPressed(PSB_L1)) {
for (drehe dich vorwärts)
solange vorwärts drehen, wie die Taste gehalten wird
}
if(ps2x.ButtonPressed(PSB_R1)) {
for (drehe dich rückwarts)
solange rückwarts drehen, wie Taste gedrückt wird
}

Soweit, so gut. Danke für alle Antworten!

MFG Alex

Hier mein aktueller Code dafür: (ganz unten ist der Part, wo später das mit dem Motor hin soll....)

#include <PS2X_lib.h>  
PS2X ps2x; 
//right now, the library does NOT support hot-pluggable controllers, meaning 
//you must always either restart your Arduino after you connect the controller, 
//or call config_gamepad(pins) again after connecting the controller.
int error = 0; 
byte type = 0;
byte vibrate = 0;
int magenta=2;
int gruen=3;
int blau=4;
int rot=5;
// Stepper Bibliothek hinzufügen
#include <Stepper.h>
// Anzahl der Schritte pro interner Motorumdrehung
const float STEPS_PER_REV = 32; 
// Betrag der Untersetzung
const float GEAR_RED = 64;
// Anzahl der Schritte pro Getriebeausgangrotation
const float STEPS_PER_OUT_REV = STEPS_PER_REV * GEAR_RED;
// Number of Steps Required
int StepsRequired;
// PIN BELEGUNG
// Benutze PINs 8,9,10,11 des Arduinos
// und verbinde diese mit ULN2003 Motor Driver In1, In2, In3, In4 
// Pins, die in der Sequenz 1-3-2-4 für die richtige Schrittsequenzierung eingegeben wurden
Stepper steppermotor(STEPS_PER_REV, 7, 6, 5, 4);
void setup(){
Serial.begin(9600);
error = ps2x.config_gamepad(13,11,10,12, true, true);  //GamePad(clock, command, attention, data, Pressures?, Rumble?) 
if(error == 0){
 Serial.println("Found Controller, configured successful");
 Serial.println("Try out all the buttons, X will vibrate the controller, faster as you press harder;");
 Serial.println("holding L1 or R1 will print out the analog stick values.");
 Serial.println("Go to www.billporter.info for updates and to report bugs.");
}
type=1;
error=0;
pinMode(2,OUTPUT);
pinMode(3, OUTPUT); //gruen
pinMode(4, OUTPUT); //blau
pinMode(5, OUTPUT); //rot
}
void loop(){
 /
error=0;
type=1;
if(error == 1) 
 return; 
if(type == 2){ 
 ps2x.read_gamepad();     //read controller 
}
else {
ps2x.read_gamepad(false, vibrate); //Ab hier beginnt der eigentliche loop, davor nur weil es auch type 2- Controller gibt, hier für den richtigen
if(ps2x.ButtonPressed(PSB_L1){
  --->Hier Motor...
}
delay(50);
} 
}
Computer, Technik, PlayStation, Drehung, Arduino, Technologie, C (Programmiersprache), Schrittmotor, Servo

Meistgelesene Beiträge zum Thema Arduino